
Gear Guide: Upgrading From Top-Rope to Lead Climbing
- Staff
- Jul 21, 2025
- 5 min read
Updated: Sep 2, 2025
You’ve conquered the fear of heights, your calluses are badges of honor, and the top-rope routes at your gym are starting to feel more like a warm-up than a workout. Sound familiar? If so, it might be time to level up your climbing game and step into the thrilling, adrenaline-laced world of lead climbing.
But before you clip that first quickdraw and yell “climbing!” into the echoing stillness of the gym or crag, let’s talk gear. Because let’s be honest: upgrading from top-rope to lead is like trading in your training wheels for a mountain bike with no brakes—you need to know what you’re doing, and you need the right tools to survive the ride.
This guide is your comprehensive breakdown of the essential gear, smart upgrades, safety tips, and insider pro tricks you’ll want in your chalk bag before you venture into the vertical world of lead climbing.
What’s the Difference Between Top-Rope and Lead Climbing?
Let’s get our definitions straight.
In top-rope climbing, the rope is already anchored at the top of the route. You climb with the rope always above you, reducing fall distances and making things generally cushier.
In lead climbing, you’re the one bringing the rope up with you. You clip it into quickdraws as you climb, which are attached to bolts or gear placements along the route. The rope trails below you, meaning a fall can be longer and a bit more thrilling.

The stakes are higher. The gear needs to be smarter. Let’s break it down.
1. Rope: Dynamic, Durable, and the Right Length
Yes, technically your gym provides a rope, but when you’re making the leap to outdoor lead or even more advanced gym routes, it’s time to get your own lifeline.
Dynamic Rope Is Non-Negotiable
Lead climbing demands a dynamic rope, designed to stretch and absorb the force of a fall. Static ropes are for hauling, rappelling, or very questionable decisions.
Rope Specs to Look For:
Length: 60m is standard for most outdoor routes, but some longer sport routes require 70m. Indoor ropes can often be shorter (40–50m).
Diameter: 9.4–9.8mm is a great range for beginners. Thicker ropes (closer to 10mm) are more durable; thinner ropes (under 9.4mm) are lighter but require more precise belaying.
Middle Mark or Bi-Pattern: Critical for rappelling and identifying the halfway point.
Pro Tip:
Label the ends of your rope with colored tape and note the purchase date. Rope doesn’t last forever—inspect it regularly and retire it if it starts to feel crispy, frayed, or sad.
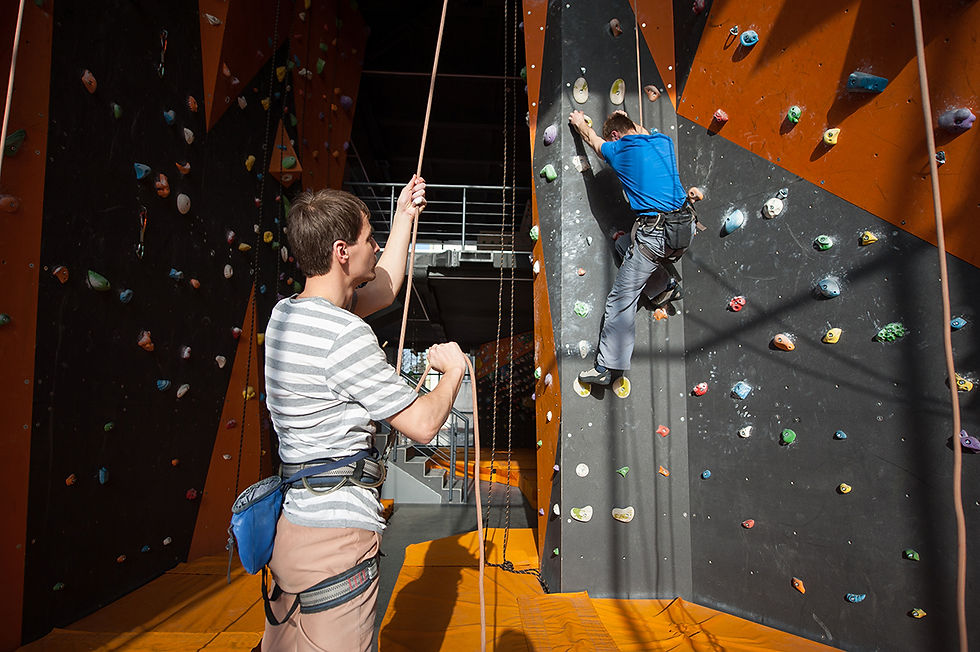
2. Quickdraws: Your Climbing Bread and Butter
In lead climbing, quickdraws are your go-to tool for attaching the rope to bolts or gear placements.

What’s in a Quickdraw?
A quickdraw consists of two carabiners connected by a dogbone—a stiff sling.
One carabiner is clipped to the bolt or protection.
The other is for your rope.
How Many Do You Need?
A full sport rack is 10 to 12 quickdraws minimum. Some routes require 14–16, depending on length.
What to Look For:
Wiregate or solid gate? Wiregates are lighter and less prone to freezing. Solid gates may feel more robust to new climbers.
Keylock nose: Avoids snagging when unclipping.
Stiff dogbone: Easier to grab when you're in a panic and hanging on for dear life.
Don’t Mix 'Em Up:
Designate the bolt-end and rope-end carabiners. The bolt-end gets all the grunge and abrasion—keep the rope-end clean to protect your rope.
3. Belay Device: Assisted-Braking or Not?
Your belay device is arguably the most important piece of lead gear, and the one most often used improperly.
Options:
ATC (Air Traffic Controller): Classic, simple, no moving parts. Good for learning, but requires more attentiveness.
Assisted-Braking Devices (ABD): Like the Petzl GriGri, Mad Rock Lifeguard, or Black Diamond ATC Pilot. These offer an extra layer of safety, especially in sport climbing.
Learning Curve:
ABDs can take some practice to feed slack smoothly when your climber is moving fast. But many gyms require them for lead belaying.
Pro Tip:
Practice lead belaying in a gym setting with supervision before taking your new device outside. And take a belay class. No shame—smart climbers are safe climbers.
4. Harness: Is Your Current One Lead-Ready?
If you’ve been using a basic harness for top-rope climbing, it’s time to ask: does it work for lead?

What You Need in a Lead Harness:
Comfortable leg loops (especially for hanging belays or taking whippers)
Four or more gear loops for racking draws, belay device, maybe a nut tool
Belay loop integrity: Check that stitching is solid and nothing is worn or fuzzy
If your harness is older than 5 years—or you can’t remember when you bought it—consider upgrading. Also: harnesses are like shoes. Fit is everything. Try before you buy.
5. Helmet: Not Optional
Outdoor climbing? Bring a helmet. Period. Don’t let Instagram fool you.
Why?
Falling rock
Swinging gear
Falling climbers
Your own skull meeting the wall during a whip
Modern helmets are light, breathable, and stylish-ish. Protect your gray matter.
6. Chalk, Chalk Bag, and Extras
Chalk may seem secondary, but sweaty fingers can be the difference between sending and skidding.
What Else to Stash:
Brush: To clean greasy holds
Tape: Finger protection and emergency fixes
Nut tool / Multi-tool (for trad, but handy for sport emergencies)
7. Anchor Building Kit (Optional but Wise)
If you’re venturing outside, you may need to clean anchors (remove gear at the top of a route), which requires:
Personal anchor system (PAS) or cow’s tail
Locking carabiners
Knowledge of how to use them safely
Take a class or go with a mentor for your first few anchor experiences. This isn’t a YouTube-and-hope situation.
8. Rope Bag or Backpack

Keep your rope clean and manageable with a rope bag. Bonus if it has a built-in tarp to lay on the ground and prevent dirt and grime from chewing through your rope sheath.
Look for one that doubles as a crag pack to consolidate your load.
9. First Aid & Safety Gear
A tiny kit with:
Bandaids
Athletic tape
Tweezers
Antiseptic wipes
Knife or multi-tool
...is worth its weight in gold. Especially if you’re deep in the woods and your partner’s hand meets a cactus.
Bonus: Know-How Is Part of Your Gear
Climbing isn’t just a sport—it’s a skillset. All the gear in the world won’t help if you don’t know how to use it. So:
Take a lead climbing class at your gym
Get lead belay certified
Climb with experienced partners
Watch and learn from climbers better than you
Practice falling—yes, on purpose—in a safe environment
Your First Lead Climbing Checklist
Before you head to the gym or crag, run through this:
✅ Dynamic rope (with a middle mark!)
✅ At least 10–12 quickdraws
✅ Harness with four gear loops
✅ Belay device (preferably assisted-braking)
✅ Locking carabiner(s)
✅ Climbing helmet
✅ Chalk and chalk bag
✅ Rope bag/crag pack
✅ First aid kit
✅ Anchor gear (if outdoors)
✅ Lead partner you trust with your life—literally
From Follower to Leader
Transitioning from top-rope to lead is like going from karaoke to live vocals on stage—suddenly, you’re in charge of the show. It’s nerve-wracking, electrifying, and incredibly empowering.
The gear you carry is more than metal and nylon. It’s your ticket to freedom, your partner in progress, and sometimes the only thing between you and a long drop. So choose it carefully. Learn it deeply. And treat it with respect.
Because once you clip that first bolt, you’re not just following anymore. You’re leading—and that changes everything.


Research about whats a diploma often highlights the importance of recognised qualifications in today’s competitive industries. The College of Contract Management Diploma Courses provides structured online education with flexible schedules for working professionals. Diploma programmes can strengthen technical and management skills for long-term career growth.
The advantages of flow production highlight how structured systems support consistent output. Workers gain confidence as they master their roles. UNICCM provides training that explores these methods.
Engineering visuals become easier to refine through fusion 3d, especially during early concept stages. The software supports both parametric and freeform modelling styles. Learning resources connected to The College of Contract Management often mention this flexibility as a career advantage.
Detailed and practical, this guide explains concrete rebar in a way that feels approachable without oversimplifying. The step by step clarity is especially useful for readers new to the subject. I recently came across a construction related explanation on https://hurenberlin.com that offered a similar level of clarity, and this article fits right in with that quality. Great شيخ روحاني resource. explanation feels practical for everyday rauhane users. I checked recommended tools on https://www.eljnoub.com
s3udy
q8yat
elso9
Using technology to increase access to youth mental health support may offer a practical way for young people to reach guidance, safe-spaces, and early help without feeling overwhelmed by traditional systems. Digital platforms, helplines, and apps could give them a chance to seek support privately, connect with trained listeners-orexplore resources that might ease their emotional load. This gentle shift toward tech-based support may encourage youth to open-up at their own pace, especially when in-person help feels too heavy to approach.
There is always a chance that these tools-quietly make support feel closer than before, creating moments where help appears just a tap away. Even a small digital interaction might bring a sense of comfort. And somewhere in that space, you…